Showing posts with label Liquid Pearls. Show all posts

Wednesday, August 14, 2013

Black and White

Hello and Happy Wednesday!!
I have a quick post for you today.
I made the following card for the
The challenge was to use Black and White only!!
I used one of the Daily Freebie files from
Miss Kate's Cuttables.
It is called Layered Overlays 2
It is no longer free, but you can get
it for only $0.50, and it comes
with 4 different designs.
I cut mine out at 5" with my
Cameo.  I welded two of the base
pieces to create the base of my card.
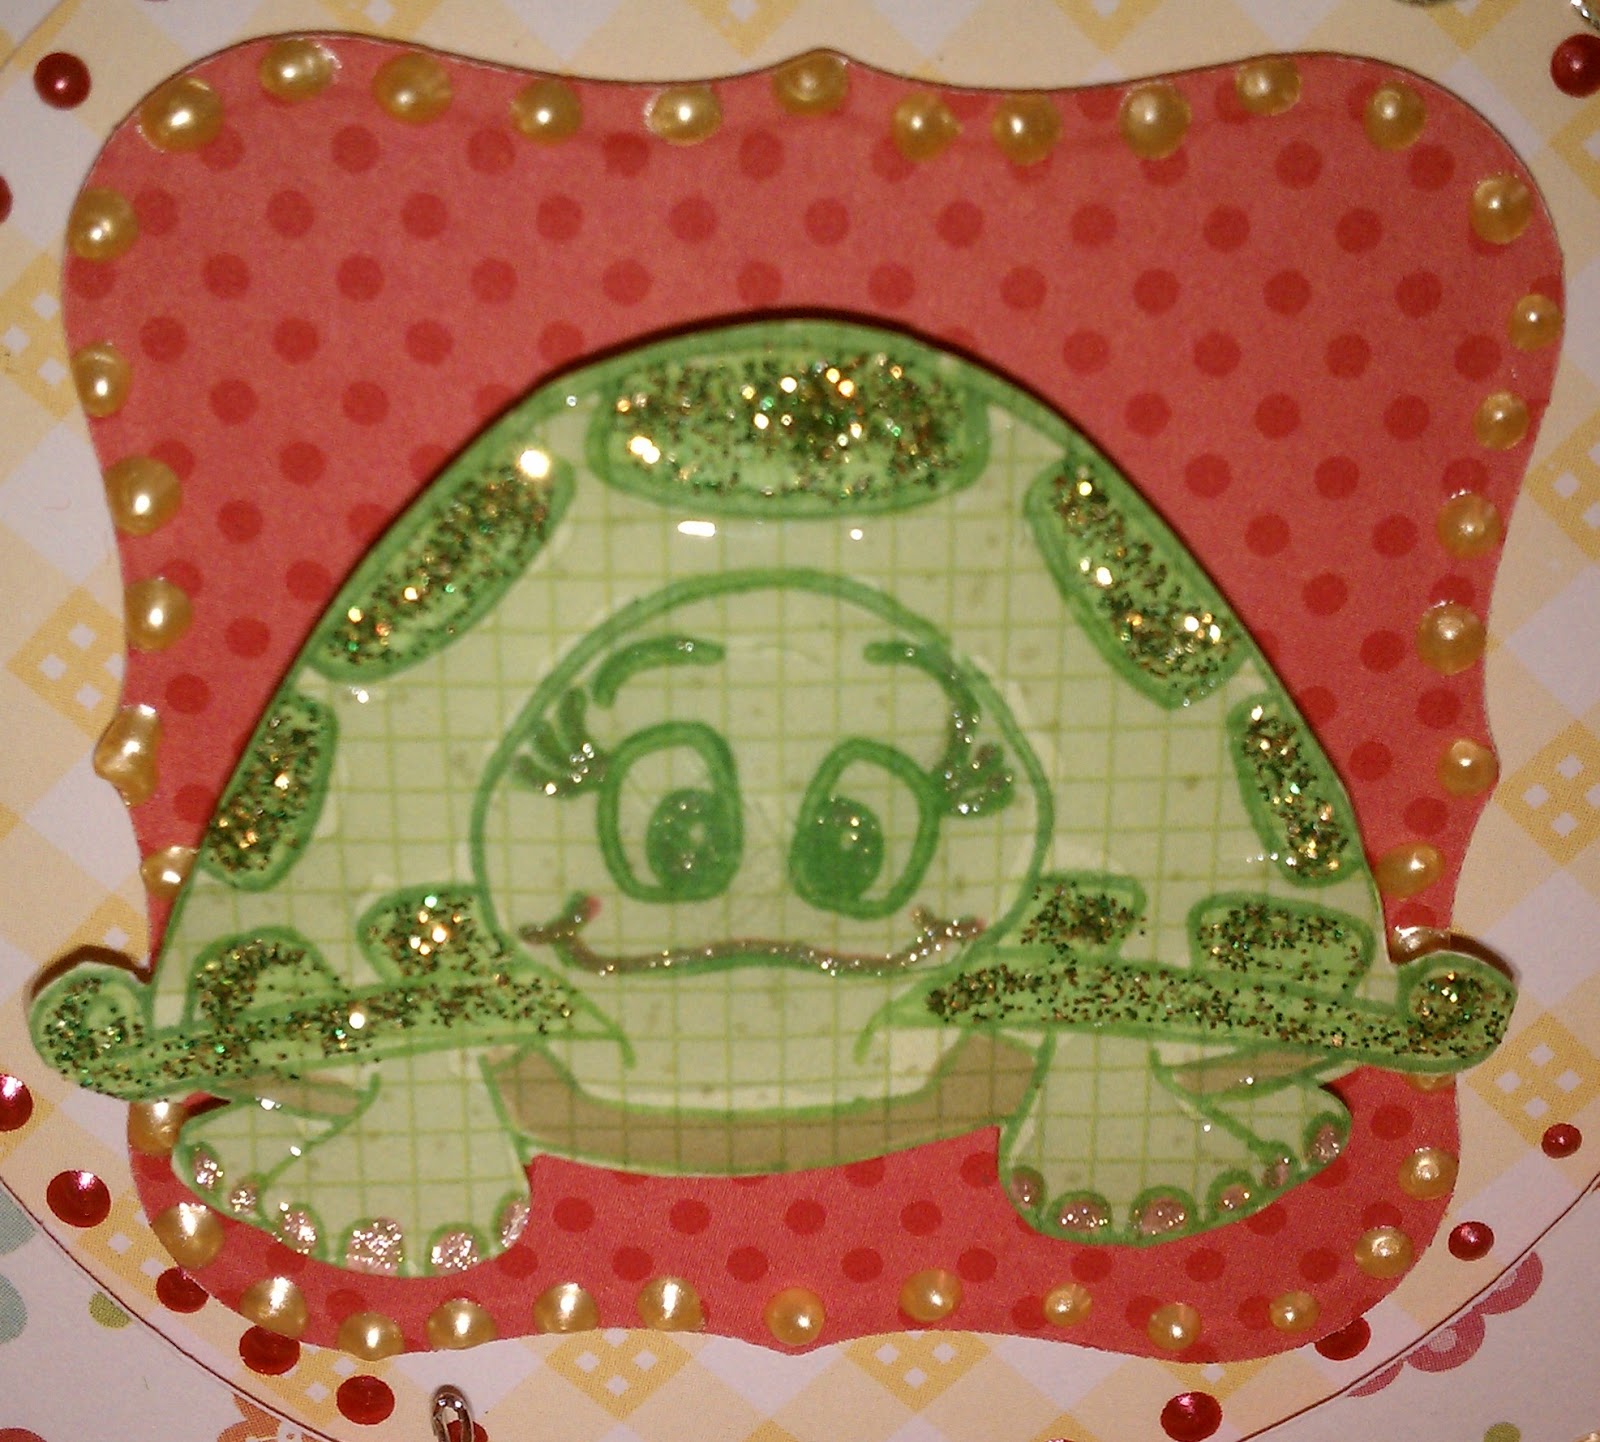
Since this overlay was so
detailed, I did not add too much to the
card. Only some white glitter tulle
and a little black ribbon.  I also
added White Liquid Pearls to
the centers of the flowers and
then covered them with white glitter!!
The card is very sparkly, but
it is hard to see in the photo.

I will also be entering this card into
the following challenges:
Silhouette Challenges - Anything Goes
Everyday is an Occassion - Sunday Funday

Wednesday, October 24, 2012

WYEGW - Use Cricut Markers or Gel Pens


For Today's Would You Ever Guess Wednesday
we were asked to use either Cricut Markers
or Gel Pens to draw our images
instead of cutting them.

I really ran with this theme
and made 3 cards.
I have only used my markers once before
and have never used my gel pens!!

All 3 of my cards were made using the
Silhouette Feature on the
A Quilted Christmas Cartridge.
All pattern paper is DCWV.

First up is Santa from page 31.
So sorry, I did not write down
what size I drew these at.
I think Santa is at 4"


I added some Xmas Red Stickles
and Onyx Liquid Pearls.


I filled in his beard and fur
on this hat and coat with Liquid Applique
and then heated it with my heat tool
after letting it dry overnight.


The sentiment is from My Creative Time's
"From Our Family to Yours" stamp set
stamped onto her Stiched Oval die.
I heat embossed with Zing Embossing powder.


Next up are the presents from page 76.
I thing these were drawn at 6" in length.
Just love the way this card came out!!

I added Silver and Turquoise Stickles
and colored the presents in with various markers
and blending pen.


The sentiment is from My Creative Time's
"Card Sentiments" stamp set
embossed with Zing Embossing Powder.

Last up is the candle border from page 69.

I added more stickles and Liquid Applique.
The sentiment is from My Creative Time's
"From Our Family to Yours" stamp set,
also heat embossed!

Thanks for stopping by and please
make sure you head on over to
to see more great projects
using the Cricut Markers and Gel Pens!!

Monday, September 3, 2012

Letter of the Day - Letter J


Hello and Happy Labor Day to
all my crafty friends!!
I hope you all are enjoying your
wonderful 3 day weekend.
 
For this week's post I chose to create
a project using "Just Because Cards".
I made a very simple card to
share with you today.
I made a round card
using the sticker feature on the cartridge. 
The card base is cut at 5" from the
Art Philosophy Cartridge.
I used Kraft Cardstock.
The boot image I chose is on
page 65, and it was cut at 4.81"
The pattern paper is from Best Creations
"Cowboy Up" paper pack that
I got from the Shop at Erica's Craft Room
I added some Cinammon Stickles
and Chestnut Liquid Pearls.


Here is the inside of the card.  The phrase is on the same page of
the book and I cut 1.82".  The paper is from the same paper pack.

 
This was a quick and simple card to make.
 
Now head on over to My Cricut Craft Room
to see what the rest of the design team made today!!


Thursday, July 12, 2012

Theme Day Thursday - ABC Carts


Hello and welcome to Theme Day Thursday with
Today we were asked to use one of the ABC carts. 
Kate's ABC's, Nate's ABC's or Noah's ABC's.
I used Kate's ABC's and Animal Kingdom.
Here is a sneak peak:

The word Baby and the banner pieces
 were cut with Kate's ABC's.
I added some liquid pearls to the
word Baby and some Glossy Accents to the
letters in the banner. I kind of messed up because
I was in a hurry.  I tried using my heat gun to dry
the liquid pearls, and they exploded!!! 
So do not try this at home...LOL

 I made this card for one of the girl's at work.
We had her baby shower yesterday and the theme
in her babies room is monkey's!!
She loved the card!!
This cute monkey head is from Animal Kingdom.
She is mounted on an action wobble.
I stamped the eyes with Peachy Keen's
Wide Eyed and Bushy Tailed stamp set.
The adorable crochet flower was from
She hand crochets these herself!!

I added a piece of lace and inked all the edges.
The adorable pattern paper was a gift from
our wonderful leader Erica!!
It is from Echo Park "Bundle of Joy".

Hope you liked my card as
much as the recipient did!!
Please stop by My Cricut Craft Room
 to see what the rest of the design team created today!!

Tuesday, June 19, 2012

Card Creating Tuesday - Sketch


Hello my crafty friends and welcome back!
As I have stated in my previous posts this month,
I have signed up to do the Sketches all this month.
I wanted to challenge myself to try some different things.
I promise, next month, you will see more than
just sketches from me!!

Here is the sketch for this week:


Here is a sneak peak:


For my card today, I used my all time favorite cartridge, Art Philosophy!!
This cartridge is awesome.


The card base and top layer were cut at 5" from page 31
of the handbook.


The paper is used for the base and layerare from Echo Parks
Hello Summer line.  Isn't it adorable!!!  I got it from
Erica's Store.  She has a great selection and great prices.
Check it out here HERE


The polka dot paper is from Doodlebug.
I used Spellbinders Label One die for the center.
The cute little turtle is from Peachy Keen's
June Stamp of the Month kit.
She is mounted on an Action Wobble.
The sentiment is from My Pink Stamper's
"Even More Punnylicious" stamp set.
I added some Liquid Pearls Dots
in Buttercup and Rouge.  I just love the new colors.
You can find them in the store too!!

I added a few butterflies from my stash and some
crinkle ribbon from 3 Girl Jam and My Craft Spot.

Please make sure you stop by My Cricut Craft Room
to see all the wonderful projects from my design team sisters!!


Wednesday, May 16, 2012

WYEGW - Use the Phrase Feature or Flocking

Welcome back for another


This is a very long post with lots of pictures, so I hope you hang around til the end!!

In case you were wondering, on Would You Ever Guess Wednesday, the design team is to use only the Feature Keys and not the main image on the Cartridges.  We can also use a Cricut Cake Cartridge for a paper project or a regular cartridge for a cake project.

For this weeks WYEGW, we were asked to use the
phrase feature on any cartridge.
We could also choose to use Flocking on a project. 
I did both!!

For my project today, I used a phrase from the Florals Embellished Cartridge
and a little bit of George and Basic Shapes.
Here is a sneak peak:
The phrase I chose is Best Wishes from page
64 of the handbook.  Now I wanted to make a
shaped card using the phrase that I chose. 
The phrases on this cartridge do not have a
shadow feature, so I had to create my own.
So, using my good old gypsy, I brought the phrase
onto my mat.  I hid as many of the line that I could,
but I still had gaps that I did not want. 
So this is where I used squares,
rectangles and other shapes from the
George and Basic Shapes cartridge to fill in those
gaps and then I welded everything together!! 
I then copied the image, flipped it and
then welded that to the first piece and voila!! 
I have my shaped card base!!
Here is a picture of the whole mess on my gypsy!!


Now, I tried cutting the card base out of
pattern paper, but it was just too busy, and plain
cardstock was too plain!!  So what I did was create
my own pattern paper with a soft pattern. 
To do this, I used a background stamp,
some versamark ink, some
clear embossing powder and my heat gun. 
I just love the way it came out!!
 Here you can see how the paper looked with and
without the stamped and embossed background!
It is hard to see, the the background has a
raised, shiny look to it, so it is soft and subtle,
but really makes a big difference. 
I am definately going to use this technique again!

So, here is my finished card:

I am really happy with the way it turned out. 
I added some liquid pearl dots.
The black fuzzy dots on the butterfly is black flocking.

Thanks for hanging in there with this uber long post!!  Make sure you stop by
My Cricut Craft Room to see all the other wonderful projects today.

Here is a list of the supplies I used:

Florals Embellished (phrase from page 64 cut at 6.5"w x 3.11" h)
George and Basic Shapes
DCWV Lemon Flower Paper Stack
Close to My Heart Adorable Backgrounds Stamp Set
Versamark Dazzle Ink in Frost
Zing Clear Embossing Powder
Doodlebug Flocking
Liquid Pearls in Buttercup and Silver Pearl


Tuesday, April 17, 2012

Mother's Day Card - Card Creating Tuesday

Hello all my crafty friends!!
So glad you stopped by today to see
what I have made.  The theme this week for
Card Creating Tuesday is Mother's Day.
I have a few Mother's Day cards to
make so this is my first one.

I used the Ole cartirdge for my card today.
I love the beautiful latin inspired images
on this cartridge.
Here is a sneak peak.

This bird can be found on page 28 of the handbook.
I only cut the Shift layer at 1.5".
I hid some of the extra lines that
I did not want on my design.

Next I cut this flower image from
page 28 of the handbook.
I flipped it with my gypsy
and cut all the layers at 3".
I addd Liquid Pearls in Canteloupe
and Mint Green and some Copper Stickles.


This Phrase was cut from page 36 at 2".
I covered the top layer with Patina Stickles.
It means "Happy Mother's Day"!!


 All the paper is from DCWV Mango Frost
cardstock stacks.  I added some
Stardust Stickles around the outside.
I used the Paisley Cuttlebug folder
and added some CTMH ribbon in Juniper.

I hope you enjoyed my card today, and please
visit My Cricut Craft Room to see the other wonderful
cards my design team sisters have made today!!

I will be entering this card in the following challenges:

Little Scrap Pieces
Die Cuttin Divas


Wednesday, March 14, 2012

Would You Ever Guess Wednesday - Textures Wet/Dry

Hello, and welcome to another


Today, the team was challenged with using Wet/Dry Textures
on our projects.  We could use Stickles, Liquid Pearls,
Liquid Applique, Viva Decor Pens, Glossy Accents,
Glimmer Mist.  Basically anything that would give our projects
some beautiful texture!!  I used several different products.
Here is a sneak peak!


For my card today, I used Art Philosophy and
Martha Stewart All Occasion Cake Art cartridges.
I also used Stickles, Liquid Pearls and
Glossy Accents to add texture.

My good friend is having knee replacement surgery next week,
andshe is realy nervous about it.  Since Saturday is
St. Patrick's Day,I decided to make her a good luck
card using my favorite color GREEN!!

I started by making some more of the beautiful flowers
from Art Philosophy.  I cut the flowers at 2.5" & 3" in
white and patterned paper.
For the big flower in the center, I cut it out in white and
then spritzed it with Glimmr Mist in Olive Twist.
For the flower in the left, I also cut it out in white, but
I just inked the edges with a Studio G stamp pad.
The flower on the right was cut from pattern paper.
I added stickles in the edges of the petals in
Lime Green and Diamond.
I put a dot of Liquid Pearls in the center.


Here are some more flowers using the same techniques.

The flowers were adhered to the card base that I cut from
Art Philosophy at 10"w x 7" h.  I added an oval in the middle
because I wanted it to be a window card.
The paper was from a Recollections Christmas Stack.
Once I cut it out, I realized that I was left with and
ugly white oval in the middle!!
So, I took some metallic rub ons I had sitting
in my chalk drawer and applied 3 different colors
with my finger.  I love the way it came out!!!
I then added a ring of Platinum Liquid Pearls on the inside
and the outside of the oval.


The Good Luck sentiment was cut from the 
Martha Stewart All Occasion Cake Art cartridge.
I cut the shadow as well.  I covered the top layer
with Liquid Glass from Close to My Heart
 to give it some shine and gloss!!

I finished it off with some crinkle ribbon. 
I sure hope my friend Pat likes her card.
A lot of love went into it!!!

Here is a picture if the inside

Please stop by My Cricut Craft Room
to see more beautiful projects!!!

I will be entering this card in the following challenges: