Showing posts with label Glossy Accents. Show all posts

Monday, September 29, 2014

Craft It Up and Link It Up #41 - Anything but a Card

Welcome to a new Craftin Desert Divas linky party!!!
We want to see all your crafty creations everything but a card!!

Every other Monday will mark the beginning of a new
semi-weekly linky party here.
I will designate a theme and invite you to
share projects you've made!!
 
And don't forget about the prizes! Every linky party will
have a sponsor and a winner, plus a top 3! The winner will be
announced on a semi-weekly basis. The more times you link up,
the more chances you have to win!!
Sponsors will be announced at the
beginning of every linky party.
This party sponsors are...

CDD- One stamp set

LSHD - $15 in files
Blumenthal Lansing Co.
Prize Package
I made two different treat boxes to share with you today
For my 1st treat box I used
Design ID #66961 from the Silhouette Store
This file only have a few cuts, but it took forever because
of all the little windows.  It has them on all 4 sides. 
I used Tim Holtz Distress inks
to color my label
and Zing Embossing Powder for the sentiment
 
For my next treat box I made a
simple Eye-catching treat :) 
 The eyes are from Peachy Keen's
The  Uglies Stamp Set.  I colored them
with my Spectrum Noir markers and
added Glossy Accents.
The Label is from Too Cute by Jessica's
Lots of Labels  file.
 I filled my box up with
creepy eyeball candies!!

The sentiments for both my treat boxes
came from Frightfully Cute
You can buy it HERE
Linky parties are open from Monday at 12AM Arizona MST
thru Sunday 12PM Arizona MST.
Any projects you submit must be linked to your blog or online gallery.
Projects must be NEW, no back linking, please.
Number of entries for this linky party is unlimited.
You may link up ANY type of craft project (layout, card, altered item, tag etc)
as long as it goes with the theme of the party.
Please link your project back to Craftin Desert Divas Linky Party.
Winners will be randomly chosen.


Tuesday, June 10, 2014

Happy Celebrations - Merry Christmas

Hello and Happy Tuesday!
Today, is my design day over at Craftin Desert Divas.
I am sharing a card I made using one of my favorite
stamp sets from the May Release.  I used "Happy Celebrations" 
This stamp set is so versatile and covers so many different occasions. 
Followers of my blog should know  of my obsession with Julie Nutting
Prima Doll Stamps.  For today's project I
made another Christmas card using a chipboard doll.
The paper and bling are from Recollections, I also used some
Webster's Pages Trim.  I added some Xmas Red Stickles
and Embossing Tinsel to the doll as well as some Glossy Accents
to her shoes and belt.
 
Here is a close up of the sentiment.  Love the font!!
For my flowers, I used Prima Chalk Edgers to
color my white flowers to match my card.
I dipped them in glue and then in diamond dust
to add some sparkle!

Thanks for stopping by!!

Monday, July 15, 2013

Boy Elf

Hello and Happy Monday!!
I hope everyone had a
great weekend.  I was pretty
hot here in So. California.
It was around 95 yesterday
and I do not like the heat!!
I had a ton of laundry to do, so that
is how I spent my weekend...lol.

Today I have a fun project to share with you.
Before Easter, I started saving the empty
toliet paper rolls.  I had plans to
make bunnies out of them but never
got around to it.  So now I have a bunch
of these rolls lying around, so I decided to
make something for this week's
Peachy Keen Challenge
13-28 :: 3-D Objects :: Wrap It In Ribbon
I made a funny little boy Elf using a file from
I used only his head and arms.
I wrapped the TP roll with some
printed paper from a stack I bought
ages ago!!  I added some ribbon from
3 Girl Jam and My Craft Spot
for his collar and belt.
I embossed his hair using the
Cutllebug Divine Swirls folder.
I also added a little distress in
in Gathered Twigs to his hair.

I used the Wide Eyed Kids Stamps for his face.
And check out my faux stiching!!
I added the stiching using my sketch pens
and my Cameo!!  This was my first time trying
this, but one of my blogger buddies
shared a great video with me that had
step my step instructions. 
The video shows how to add the stiching with te
the print and cut feature, but I just used my sketch pens
and it worked perfectly!!

Not sure yet, what I am going to use my
little elf for.  I could just use him as
decoration, or fill the tube with
candy and use him as a treat!!

I will be entering him
in the following challenges:


Friday, May 31, 2013

Peachy Keen Sketch Challenge # 13-22

 
Wow, I cannot believe it has been a month
since I have posted anything!!
May has been a tough month for me.
I have been sick with a bad chest
cold for almost the entire month.
Finally went to the Dr. today and
it is only a viral infection, my lungs are
clear, thank goodness!!
 
My husband and I also took a vacation
to Portland, Oregon a few weeks ago
and I absolutely loved it!!
Portland is so green and beautiful!!
 
One great thing that happened was
I finally got my brand new Sillouette Cameo
this week!!  I am so excited to share my
very first project with you today.
 
is a Sketch Challenge.
Here is the sketch:
 
 
I made the following card with the free
SVG files that are provided to the
Peachy Keen Stamp of the month
subscription members.
 
The pattern paper is from
DCWV Nana's Kitchen Stack
and I have added a strip
of My Mind's Eye Washi Tape
and some Recollections Gems.
 

Here is a close up of the Piggy!
Isn't she adorable!!
I first cut her  with my Cameo
along with a shadow using
the offset feature, wow,
so easy to create!!
I then stamped the image
onto the cut piece
I added a little defination
using my blender pen and
some Stampin Up ink and markers.
I also added some glossy accents
to the eyes, hooves and tummy.


I created my sentiment using My Creative Time
and K Andrews stamps.


My piggy is mounted on an Action Wobble,
 
Thank You Peachy Keen for the free SVG's!!
I cannot wait to create and share more
projects using my Cameo!!
 

Saturday, April 20, 2013

You Make Life Sweeter

Hello and happy Saturday!!
I have a card to share with you that I made for the

I used a few different Peachy Keen sets for this
card.  I started with a plain white A2 card base.
I inked it with Tim Holtz Distress Ink
in Stormy Sky and Mowed Lawn.
I then stamped the flowers from the
April SOTM.  I then paper pieced each flower
with some pattern paper from Doodlebug.
I colored in the leaves and added some
Stardust Stickles to add some sparkle.

The cute little skunk is from the Cottage Cutz
Stinky Skunk  Die and Stamp set designed
by Peachy Keen.  I cut her from gray cardstock and
then added  some Distress Ink in Black Soot.  I
stamped one  of the faces that came with the
die and added glossy accents. 
My sun is a punched circle cut down to fit in the
corner and I added some Distress Ink in
Mustard Seed and Wild Honey.  The cute face is
from the new Moodies Assortment from Peachy Keen.

My banner was cut from My Creative Time die
and the sentment is from Pink By Design
"Country Life" stamp set.  Stamped with
Versamark and then embossed with Zing
Embossing Powder in Neon Pink.
I added a tiny bit of twine and a butterfly
from my stash.

I will entering this card in the following challenges:
My Craft Spot - Anything Goes Challenge

Saturday, April 13, 2013

Make Lemonade

 
Hello, I have a quick post to share with you today.
I made a card for the
 
Here is the photo inspiration:
 
 
I took my inspiration from the colors,
the fruit and the drink.
Here is my card:
 
The mason jar stamp from the Peachy Keen
April SOTM reminded me of Lucille's Smokehouse.
They serve all their drinks in mason jars.
Their lemonade is especially yummy.
I stamped the jar using Brilliance Starlite Silver ink
I then colored in the lemonade using
my Stampin Up markers in Yoyo Yellow.
I then coved the entie jar with Glossy Accents.
(as you can see, the color ran a little...oopps!!)
The sentiment came from Just Becasue Cards
Cricut Cartridge cut at 2.5".
 
My cute little lemons were cut from Simply Charmed
at 1.75" and the lemon slices were cut
from Savory at 2.6".  The cute faces
on my lemons are from the
"Erkle and Merkle" Assortment.
 
The papers are from My Mind's Eye
6x6 Happy Day paper pad.
The ribon is from Michaels.
I also added some distress ink.
 
I will also entering this card in the following challenges:
DL Art~ Linky Party
 
Also, I am  very excited to say that my husband told me
last night to go ahead and order my Silouette Cameo!!
It was the one and only thing I want for my birthday this month
and now it is ordered and I hope to be playing with it soon!!
I have asked my son for a gift card from either the
Silouette Store, Pretty Paper Pretty Ribbons
or Miss Kate Cuttables!!
(or all three..he, he, he)


Friday, March 22, 2013

Rainy Day Duck

Hello and Happy Friday!!
I have a quick post for you today.

I just love this cutie patootie little duck!!


The duck is cut from my brand new
Peachy Keen Cottage Cutz
Duck w/Egg die and Duck Accessories.
The cute little face stamp was incuded
with the Duck die.
I have embossed her using the
Cuttlebug Swiss Dots Die and
inked her up with TH Distress Ink
in Mustard Seed and Dried Marigold.
I colored her face in and
added glossy accents.
Her hat is inked with Pickled Raspberry.
She is mounted on a a piece cut from
My Creative Time's XL Label Die.

The sentiment was stamped from
My Creative Times Teeny Tag Stamp Set
and mounted on pieces cut from
her Build a Banner Die Set.


The papers are from Imaginisce and Doodleb
ug.
The Washi Tape is from My Mind's Eye.
I added some bling to the raindrops.

I will be entering this into the following challenges:
Peachy Keen Sketch Challenge
My Creative Time Designer Challenge - Tic Tac Toe
(I did the top row, Use a Die, Embossing and Bling!)
Craftin Desert Divas - Easter Linky Party
Our Kreative Karma - March Challenge

Sunday, January 20, 2013

For Someone Beary Special


Hello All My Crafty Friends!! 
It has been almost a month since my last post.
I finished my term on the
My Cricut Craft Room Design Team
and I decided to take a little break.
December and January are very
busy for me at work. 
I've missed you all and it feels good
to be in my craft room again!!
I have a cute little gift bag to share with you today.
I made this cute little gift bag for my daughter in law’s birthday present.  I started with a kraft gift bag.  All the paper I used is from a My Mind’s Eye 6x6 Paper Pad called Miss Caroline.  The first layer was embossed with a Sizzix folder called Cottage Style.  I inked it with Tim Holtz Distress ink in Tea Dye and Mustard Seed.  The next layer is a Spellbinders Curved Rectangles Dye, inked with Mustard Seed and Tea Dye Distress Ink.  The next layer is a Spellbinders Labels 10, inked with Dried Marigold Distress Ink.  And the cute little bear in her jammies is from the Peachy Keen January Stamp  of the month.  Her face is from the same stamp set.  Isn’t she just the cutest!!
Here is a close up of her cute little face.  I added some pink chalk to her cheeks as well as some freckles.  I also added glossy accents.
The sentiment is from the same stamp set, stamped onto another cut
from Spellbinders Labels 10.   I added a cute little button from
3 Girl Jam and some twine.  I also added some decorative trim from
Webster’s Pages to the top of the bag, a little bling from Recollections
 and I tied a bow with some crinkle ribbon from 3 Girl Jam.

I will be entering this into this week's Peachy Keen
PKC 13-3 :: 3-D Objects ::
Bears, Bears, and Bears, Oh My!
The challenge so to make a
 3D project using a Bear!!

I am also entering this into the following challenges:
Sunday Funday #5 - Anything Goes
DL.ART Thankful Thursday Challenge
- Anything Goes
 Frosted Designs Fabulous Friday Challenge
-Give a gift


I am having surgery on my foot this Friday so it
may be awhile before I can get back
 into my craft room, but I am am sure I will be
spending plenty of time on my comupter and
visitng all of my favorite blogs
to see what you all create :)

Thanks for stopping by today!!

Friday, October 5, 2012

October 100 Cartridge Blog Hop


Welcome to Erica's Craft Room

100 Cricut Cartridge Blog Hop Day ONE

You should have started at http://mycricutcraftroom.blogspot.com/
if not please start at the beginning

Collectively the design team uses over 100 different Cricut Cartridges in their projects during the two days of this hop.


For this months Hop I chose to use the
following cartridges,
Trick or Treat, October 31st,
Thanksgiving Seasonal,
and Very Merry Tags.

For this first card, I cut the Witch  at 4" 
from Trick or Treat and the cauldron
was cut at 2.25" from October 31st .


The paper is Imaginisce Monster Mash.
Her cute little face is stamped with
Peachy Keen's Wide Eyed Kids Assortment.
I covered the entire cauldron in glossy accents
and added Firefly stickles.
The tag and sentiment are from
My Creative Time.


I finished off the card with some crinkle ribbon
from 3 Girl Jam and added my very first homemade stick pin!!

I will be entering this card in the following challenges:


For my next card, I used Thanksgiving Seasonal.
The leaf and scroll were cut at 1.70" and the
Thank You was cut at 2.25"


The paper is from DCWV Fall Stack from last year.
I covered the leaf with Flower Soft in Autumn.
It has a wonderful fuzzy texture!!


For my final project, I used Very Merry Tags.
These tags were all cut at 4" and
were so easy and fast to put together.
All paper is from DCWV Christmas and
Winter Stacks from last year.
I even saved the negative pieces left
over and plan to use them
to make additional tags.


I added a little bit of stickles to accent the tags
and some ribbon from my stash.


Thank you for stopping by today.
Your next stop will be the
wonderful Shelly.

Please be sure to visit and comment
on each stop along the way as
always has a fabulous giveaway!!

Here is the entire lineup in case you get lost.


MCCR http://mycricutcraftroom.blogspot.com/
Kathy http://3spoileddogs.blogspot.com 
Shelley http://shelley-scrapbookingforfun.blogspot.com
Claire http://threewaterscreations.blogspot.com
Mary http://Mary-fortheloveofart.blogspot.com
Lisa Chamberlain http://lisacustomscrapbooking.blogspot.com
Nadja http://nadjarobbins.blogspot.com
Janet http://janetscreativeworld.blogspot.com
Jenn Lorist http://www.jennspapercrafts.blogspot.com
Erica's Projects http://ericasprojects.blogspot.com/
Heather http://heathernovinger.blogspot.com
Robin http://create-a-latte.blogspot.com/
Teresa http://www.createenjoyshare.blogspot.com
Tammy http://www.Cuttinandstampin.blogspot.com
Cathy http://cathyplus5.blogspot.com
Lisa carrier http://ourcraftingcorner.blogspot.com
Jessica S http://jessicascraftshaque.blogspot.com
Blog Candy http://ericasblogcandy.blogspot.com/


Wednesday, September 12, 2012

Baby Shower Centerpiece

Ok, so today, I think I totally messed up...lol
Today is Would You Ever Guess Wednesday over at
On WYEGW, we are supposed to use any
image EXCEPT, the main image on the page.
Today we were also to use either 3 tags
or a rosette on our project.
Well I totally concentrated on the rosette piece
and forgot that I was not supposed to
use the main images.  I sure hope Erica
does not fire me for not
following the rules...LOL

So for this week's project I used
Ribbons and Rosettes(for the first time!!),
Create a Critter and Animal Kingdom.

Awhile back I had made a baby banner for one of
the girls at work.  Everyone loved it and one of
the other ladies in the office has a new grandson
due next month and she asked me if I could
make the same animals on sticks so that
she could but them in a floral center piece.
I told her sure I could do that!!
This is what I came up with.


All the rosettes were cut at 2" from page 23
of the book.  I cut 6 pieces for each rosette.
I used a Marvy Uchida Jumbo Scalloped
Circle Punch for the center piece which
I then embossed using the Cuttlebug
Spots and Dots folder.
All the pieces were inked with
Distress Ink in Mowed Lawn
and Broken China.
All animals were cut from Create a Critter
except the Tiger, he is from Animal Kingdom.
 Most of them were cut at 2.5"
All the faces were stamped with
various Peachy Keen face stamps.
I added some ribbon from Michaels to each one.
 
Now I just did not want to hand them to her,
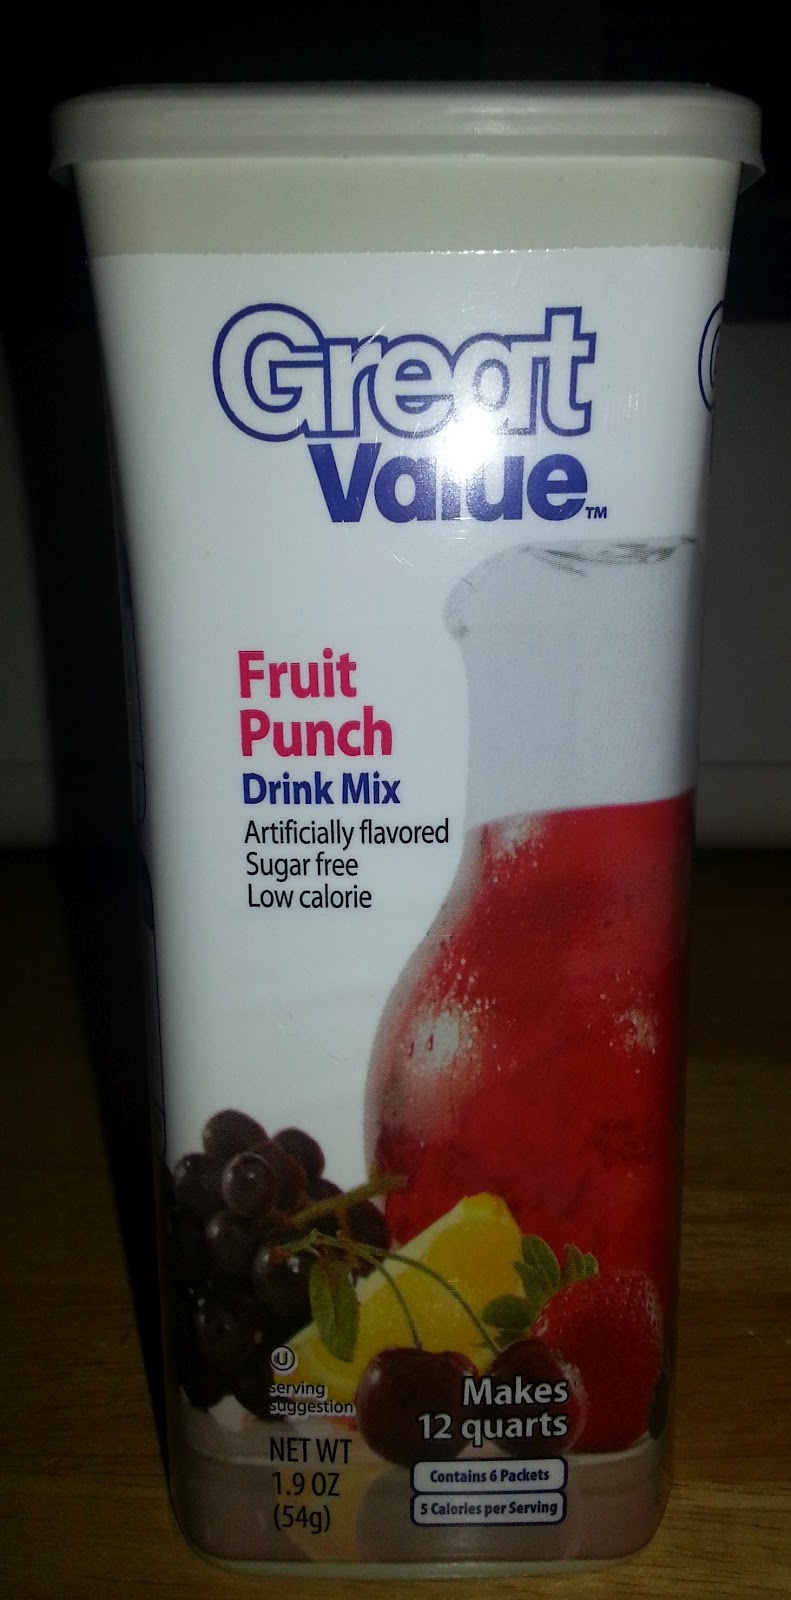
so I decorated a recycled drink mix container
to put them in. This is what I started with:
 
I took off the packaging and this is what was left.
I have been saving these and knew some
day I would have a use for them...LOL


 I originally only made one, and put all
six in the same container.  She liked it so much
she asked  me to make her two more!!
I put some little glass pebbles in the
 bottom to weigh them down.
 
 
I had so much fun making these and finally
using my Ribbons and Rosettes cartridge.
They were alot of work, but turned out so cute!!
Plus I got paid for making these!!

Here are some close ups of the animals:


Make sure you check out
the rest of the design team
projects over at My Cricut Craft Room
 
I am going to enter this into the following challenges